| 1.
Prepare for Memory Stick Duo / Memory Stick Pro Duo media. |
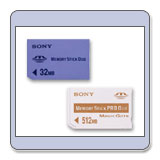 |
| Ensure that the Memory Stick Duo / Memory Stick Pro Duo media to be used is blank and recently formatted with the DSC-T1 camera. |
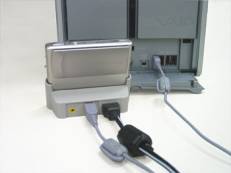
| 2. Check the AC adaptor. |  |
| Confirm that the Cyber-shot camera is fully powered by the AC-LM5 AC adapter plugged into a working power outlet. |
|
Warning: |
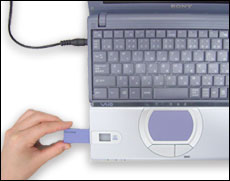
- Insert
the formatted Memory
Stick Duo / Memory Stick Pro Duo media into the Memory
Stick / Memory Stick Pro Slot or Adapter on the computer.
- Copy
the DSCT1V2.ash file from the computer onto the Memory Stick Duo / Memory Stick Pro Duo media.
- Right-click
the DSCT1V2.ash file, and click Copy. On the Windows
Desktop, click the My Computer icon.
- At
the My Computer window, click to open the Memory Stick drive icon.
- At
the Memory Stick Drive window, right-click on a blank space in
the window, and then click Paste to copy the file to the root
(main) Memory Stick media directory.
- Insert
the formatted Memory Stick Duo / Memory Stick Pro Duo media into the
slot on the Cyber-shot.
- Select Normal of USB connect at the Step 2 menu on the Cyber-shot.
| Warning: PTP connection is not available for this copy. |
- Using
the USB cable supplied with the camera, connect the Cyber-shot to the
computer.
- Copy
the DSCT1V2.ash file from the computer onto the Memory Stick Duo
/ Memory Stick Pro Duo media.
- Right-click
the DSCT1V2.ash file, and click Copy.
- On
the Windows Desktop, click the My Computer icon.
- At
the My Computer window, click to open the Memory Stick Drive icon.
- At
the Memory Stick Drive window, right-click on a blank
space in the window, and then click Paste to copy the file to the
root (main) Memory Stick media directory.
- Select
the DSCT1V2.ash file, and then copy it.
- Disconnect the USB cable accordingly to the Instruction Manual of the Cyber-shot after the DSCT1V2.ash file is copied to the Memory Stick Duo / Memory Stick Pro Duo media.
Please continue with
the Updating the Camera Firmware section.
To update the firmware
onto the Cyber-shot,
1.
Insert the
Memory Stick Duo / Memory Stick Pro Duo media containing the Firmware Update
Utility into the Cyber-shot.
2. Switch ON the power of the Cyber-shot. It will take a few minutes or approximately 1.0 minutes for the firmware update to complete.
NOTE:
Please do not use the supplied battery to perform this firmware update.

Step 1: Set the update mode
1.
Connect
with the AC-LM5 AC adaptor that is supplied with the DSC-T1 camera.
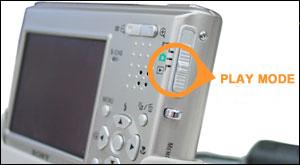
2.
On the
Cyber-shot, turn the mode-SW to PLAY mode.
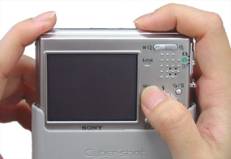
The camera must be off before pressing and holding the MENU button.
4.
Release
the MENU button.
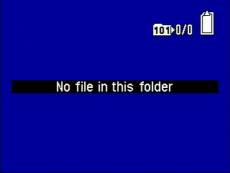
NOTE:
The
message No file in this folder may appear on the screen even though
the inserted Memory Stick has the firmware recorded in it. This is normal
(not failure). Please proceed to the next step.
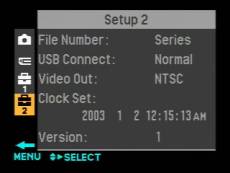
Step
2: Confirm current version
1.
Press the MENU button.
2.
Select Setup, at the end of the MENU screen.
3.
On the camera screen, select Setup 2 (the bottom icon on the
left-hand side).
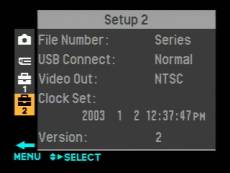
4. Confirm the Version listed is 1 at the Setup 2
screen.
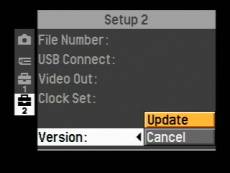
Step
3: Update the version
1.
Select Update, at the Version menu.
A
black screen will appear stating Access.


| NOTE: If any error occurs, please refer to the following for any corresponding Solution. |
|
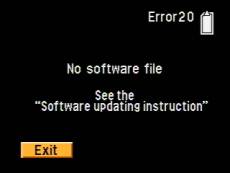
1. Error
20: No software file
If an error message Error 20 - No software file appears, this could be caused by DSCT1V2.ash update file was not found on the Memory Stick. To resolve this, return to Software Updating Instructions and follow the steps to copy the file over to the Memory Stick Duo / Memory Stick Pro Duo media. |
 |
|
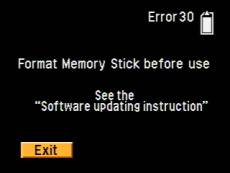
2. Error
30: Format Memory Stick before use
If an error message Error 30 - Format Memory Stick before use appears, this could be caused by the existence of other files or folders in the Memory Stick Duo / Memory Stick Pro Duo media. To resolve this, follow the instructions that came with your Cyber-shot to format the Memory Stick. Then return to Software Updating Instructions and follow the steps to copy the file over to the Memory Stick. |
 |
|
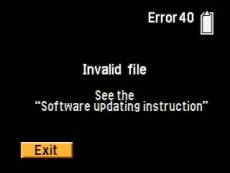
3. Error
40: Invalid file
If an error message Error 40: Invalid file appears, this could be caused by file on the Memory Stick Duo / Memory Stick Pro Duo media is corrupt or the version of the file to be installed is the same or older than the current one in the Cyber-shot. To resolve this, check the firmware version of the Cyber-shot and if older than the Firmware Update Utility Version 2.0. Then return to Software Updating Instructions and follow the steps to copy the file over to the Memory Stick and update the Cyber-shot. |
 |
Please continue with the Check the Firmware Update Utility Version section.
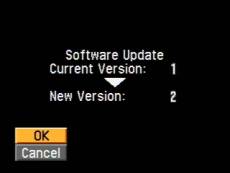
Step 4: Check the Firmware Update Utility Version
To
check the Current and the New Version.
1.
Confirm the versions listed next to Current and New, at the Software Update
version screen.
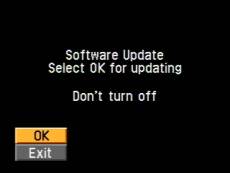
2. Select OK, to continue with the firmware update.
Step 5: Start to update
1.
Select
OK, if the updated version is correct.
(It will take a few minutes (approximately 1.0 minute) for the firmware to
update complete.)
Note:
Select Cancel, if the New Version is lower or the same as the Current
Version as this Firmware update is not necessary. Then return to the top
page and check that the latest version available for the model is
downloaded.
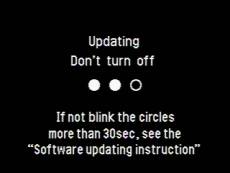
As the firmware update installs, the circle signs will begin to blink and then turn on one-by-one. Once all three circles are lit, the update is finished.
Note:
If one of the following errors appears, please refer to its corresponding
Solution. If no errors, then continue with step 4.
|
|
sign blinking
PICTURE |


| If any error occurs, please refer to the following for any corresponding Solution. |
| If the circles signs are not fully lit and do not blink for over 30 seconds, this could be cause by the update has failed. To resolve this, remove the AC adapter from the Cyber-shot and go to Re-Updating Instruction. |
| Error 10 | 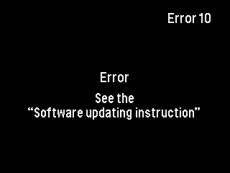 |
| If an error message Error 10: Error appears, this could be caused by the update has failed. To resolve this, remove the AC adapter from the Cyber-shot and go to Re-Updating Instruction. |
To complete the firmware update, push the RESET button using a sharp-pointed object.
Note: During this reset, the camera must be in OFF mode.
In the Reset, please note that following functions will be reset as default: Volume, Beep, Metering Mode, White Balance, ISO, Picture Effect, Sharpness, Saturation, Contrast, Scene Selection, EV, AF Range Finder Frame, Multi Burst Shutter Interval, AF Mode, Digital Zoom, AF Illuminator, BRK (Bracket Step), Macro Mode, Flash Mode, Slide (Interval, Image, Repeat), OSD On/Off, Histogram On/Off, LCD Backlight On/Off, Picture Quality, Image Size, Camera Mode, Date/Time, Control Button Position, Flash Level, Red Eye Reduction and USB Connect.
Step
7: Finish
1. Turn the mode-SW to PLAY mode.
2. Press and hold on to the Menu button and turn ON the
Cyber-shot.
Note:
The camera must be OFF before pressing and holding the MENU
button.
3.
Release the MENU button.
4.
Push the MENU button.
5.
Select Setup at the end of MENU.

To check the version in the Cyber-shot.
1. Select Setup 2, at camera screen.
2. Confirm the version listed is 2, at the Setup 2 screen.
Note:
If the current version listed is lower than, and not "2", it may be necessary to download and install the firmware update utility again.
The
installation of the DSC-T1 Cyber-shot Camera
Firmware
Update is now complete.
Thank
you for upgrading the firmware.
Format the Memory Stick Duo / Memory Stick Duo Pro after completion of firmware update.